How to Waterproof an Internal Corner on a Rubber Roof using Uncured Elastoform Tape (Form Flash)
How to Waterproof an Internal Corner on a Rubber Roof
Step by Step Installation Guide
-
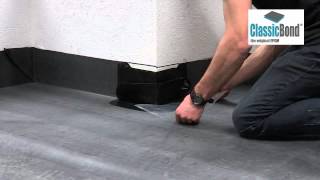
Seal the Detail

Once the membrane is installed to the upstand and the excess membrane formed into a neat fold, or pigs ear, the detail can be sealed.
-
Mark the Fold of the Membrane

Mark the fold of the membrane vertically 75 millimetres from the corner
-
Remove Excess Membrane

Remove the excess membrane from the fold
-
Mark the Area to be Taped

Mark the area to be taped 75 mm beyond this cut, giving a total distance from the corner of 150mm
-
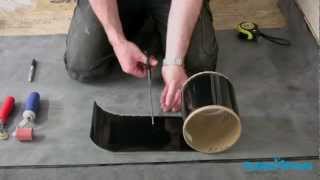
Cut the Flashing Tape

Cut the 228mm pressure-sensitive uncured flashing tape to this size and remove the corner that will remain visible
-
Position the Tape Over the Fold

Position the tape over the fold and mark around it to create a target area for EPDM primer
-
Prime the Membrane

Prime all three areas as indicated, for dusted membranes primer must be applied with the scrubbing pad. If the membrane is factory pre-cleaned, a brush may be used
-
Scrub Primer Into the Service

Scrub primer into the surface ensuring it is applied to the entire target area. The backwall the underside of the fold and the front of the fold all require priming. Ensure hands are clean and dry before moving on to the next stage.
-
Touch Test the Primer

Touch test the primer to ensure it is thoroughly dry and flashed off. It shouldn’t leave a fingerprint or transfer to your hand.
-
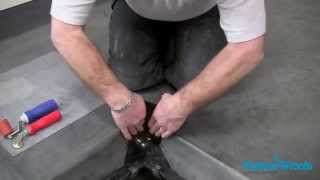
Tuck the Fold Back into Position

When the primer is ready the fold can be tucked back into position prior to the tape being installed over it.
-
Anchor the Pressure Sensitive Tape

Anchor the pressure sensitive tape at the bottom corner, allowing you to ensure it is vertical, then drive all the air out from beneath the tape either using your hands or the roller.
-
Ensure the Pressure Sensitive Tape is Fed Into the Step

Finally, ensure that the pressure sensitive tape is fed into the step created by the pigs ear and trim off the excess from the top, if necessary.
-
The End

Well done! You have successfully waterproofed an internal corner on a rubber roof.