This Video will show you how to waterproof an external corner on a skylight or upstand on an L shaped roof using the 9" Uncured Elasoform Tape (Form Flash)
How to Waterproof an External Corner on a Rubber Roof


Step by Step Installation Guide
-
Complete the corner

Once the membrane has been installed the corner can be completed with 228 mm pressure-sensitive uncured flashing tape. This is a one part corner detail.
-
Mark out the position of the tape

Mark out the position of the pressure sensitive tape. It must extend 50 mm beyond the cut membrane at its highest point.
-
Cut the tape to size

Cut the tape to size and shape it. Any visible corners need to be removed to ensure the detail has maximum strength and a tidy appearance.
-
Position the tape

Position the tape, ensuring it extends 75mm onto the deck area and 50 mm beyond the membrane at the highest point.
-
Mark around the tape

Mark around the tape to create the target area for EPDM primer to extend beyond.
-
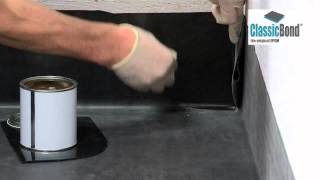
Apply the primer

On dusted membranes, primer must be applied with a scrubbing pad. If the membrane is factory pre-cleaned a brush may be used. Scrub the primer into the surface ensuring it is applied to the entire target area including the substrate, whether this is brick work, block work, plastic or virtually any surface.
-
Remove excess primer

Remove any pools of primer to create a thin even coat. Ensure your hands are clean and dry before moving on to the next stage.
-
Touch test the primer

Touch test the primer to ensure it is thoroughly dry and flashed off, it shouldn't leave a fingerprint or transfer to your hand.
-
Remove the cellophane

Remove the cellophane, using it to prevent the tape bonding to the deck whilst working on the up stand, and apply the pressure sensitive tape. Start at the top working down the wall - when you are within 10 mm of the deck, turn the flashing tape around the corner and repeat the action, continuing to within 10 mm of the deck area.
-
Bring the pressure sensitive tape down

Once the wall section is complete, bring the pressure sensitive tape down the remaining 10 mm to the deck, press the tape into the angle change at the base of the wall from the reverse side. Ensure that all air is removed, continue this until the flashing is tight into the corner around the entire detail, using the cellophane if required. When this is complete, the pressure sensitive tape can be brought down onto the deck to create the corner detail.
-
Smooth the tape onto the deck

Start at the back and smooth the tape uniformly and evenly onto the deck using minimal pressure.
-
Activate the pressure sensitive adhesive

Once the tape is being positioned, ensure it is rolled to activate the pressure sensitive adhesive.
-
You've done it!

There you have it – your external corner is waterproofed