A complete step-by-step guide and video on how How to install a ClassicBond Pro EPDM rubber roof
How to install a ClassicBond Pro EPDM rubber roof
Step by Step Installation Guide
-
Roof Deck Preparation

Clean the roof surface prior to installation
Be sure the roof surface is clean, free of dust, dirt, rust, oil, grease, and loose material. The roof surface must be dry. This product will not adhere to wet surfaces. Trapped moisture may vaporize and negatively affect the performance of this product. This system can be laid over old felt, asphalt or deck boards where the felt has been completely removed.
Any residual Bitumen from an old roof that is tacky and non-oxidised must either be removed or over boarded as this will adversely affect the performance of the EPDM rubber membrane.
-
Install Drip Batten

Install the Drip batten wherever a gutter is present. This will extend the roof deck so that water run off drips in to the gutter rather than behind the gutter.
-
Install Drip Back Drip Trim

The Drip Trim has a front and back piece. Install the Drip Trim backplate using the nails provided. Align the curved top edge of the trim with the timber batten.
-
Chase out Wall Upstand

Chase out brick mortar joint using angle grinder or mortar chisel ready to accept Wall Trim flashing.
-
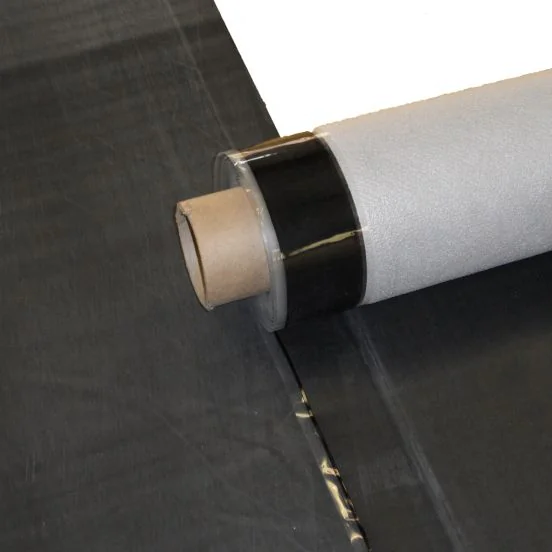
Roll out Membrane

Starting from one edge roll out the DuoPly membrane into position
-
Apply Deck Adhesive

Roll or fold back the membrane to expose roof deck and apply Water Based Deck Adhesive using a 9" paint roller. Leave a 150mm un-bonded area around the roof deck perimeter for bonding later with Contact Adhesive
Roll the EPDM membrane back in to position immediately whilst the adhesive is STILL WET
If the adhesive dries out (becomes opaque) before the membrane is relayed then a thin coat can be applied to the back of the MEMBRANE and allowed to dry before installing. Apply adhesive to smaller area in hot whether to avoid premature drying.
(Water based adhesives should only be used when the outside temperatures is 4 degrees and rising and no chance of freezing conditions in the following 24-48 hours)
-
Sweep Membrane

Sweep EPDM membrane to remove trapped air and improve bonding to substrate.
-
Roll out the next row of EPDM

Roll out the next row of EPDM and adhere in the same manner as above. Leave a 75mm overlap for the seam and mark a line down the edge of the tape.
-
Apply DuoPly Primer

Using the marked line as a guide apply DuoPly Primer to the bottom sheet. This can be done using a scrub pad or brush. Allow primer to become touch dry, 10 to 15 minutes is usually sufficiant.
-
Remove film from pre-applied tape

Once the prime has become dry, release 200-300mm of the protective film from the tape and press the top membrane onto the primed area. continue to remove film along the seem and press taped edge of membrane into position
-
Roll Seam with seam rioller

Apply pressure to seam by rolling with sillicon seam roller. Rolling at right angles to seam not along it to to achieve full seam strength and ensuring there are no bubbes.
-
Apply Contact Adhesive to Roof Perimeter

Apply a THIN coat of Contact Adhesive to the roof deck perimeter (approximately 150mm width) and any vertical upstands. Also apply the Contact Adhesive to the back of the rubber membrane.
Contact Adhesive can also be used to bond the rubber membrane to most porous and non-porous surfaces so can be used in place of water based deck adhesive if necessary
-
Ensure Contact Adhesive is Touch Dry

Ensure the Contact Adhesive is touch dry and there are no puddles of adhesive. Work the membrane into the the right angle and up the upstand or along edge of roof if no upstand is present.
The Contact Adhesive gives off a vapour as it cures. If the membrane is bonded before the Contact Adhesive has fully dried bubbles/blisters may appear. These bubbles should disappear over time due to the EPDM membrane being breathable.
-
Cut Back Excess Material

Trim any excess material from walls and upstands using the chase out as a guide.
-
Cut Elastoform to size

Elastoform is used to waterproof profiles in the roof shape which can not be achieved with the rubber membrane such as external corners.
Cut 9" Elastoform to size allowing upstand height plus an extra 75mm on the length by 150mm on the width. (75mm on to rubber & 75mm on to Brick/render).
-
Apply Rubber Primer

Apply an even coat of EPDM Rubber Primer using a paint brush to an area slightly larger than the Elastoform patch.
-
Ensure Primer is Touch Dry

Ensure primer is touch dry.
-
Install Elastoform

Install Elastoform Tape.
When installing Elastoform always bond the area which requires no stretching first, leaving the stretching part until last.
Keep the Elastoform in a warm place in cold weather as this will aid the moulding process.
-
Apply Pressure to Elastoform

Apply pressure to Elastoform to ensure fully bonded.
-
Stretch Elastoform

Stretch Elastoform.
-
Penny Roller Detail

Apply light pressure using penny roller to ensure Elastoform bonds to all surfaces.
-
Install Wall Trim

Install Wall Trim in to chased out mortar join.
-
Drill Wall Trim

Drill Wall Trim and wall with 7mm masonry drill to accept rawlplug.
-
Install RawlPlug

Install RawlPlug.
-
Install Fastener

Install Fastener.
-
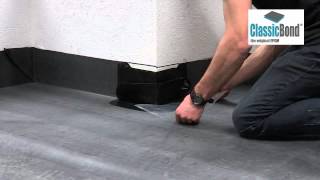
Install Mastic to Wall Trim and Wall Slot

Apply mastic to wall trim and wall chase out.
-
Folding the Rubber Membrane on a Roof Corner

The membrane can be folded without cutting when detailing an external roof corner prior to installing edge trims.
-
Form Pigs Ear

Pinch the rubber membrane together to form a pigs ear.
-
Fold Pigs Ear

Fold pigs ear on to side of roof.
-
Fit Trim Corner

Place the trim corner in position apply pressure to squash the foam sealer and nail the polypins in to fascia and batten.
-
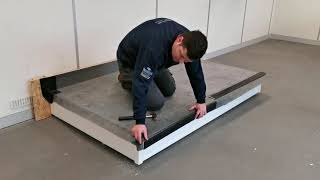
Fit Plastic trim Kerb Edge

The Plastic trim Kerb Edge is designed to deflect water back on to the roof. (traditionally this would be achieved with an arris rail).
Cut the kerb edge trim to length and apply pressure to the top of the trim and then polypin to secure
The foam should be compressed by 70-80%
-
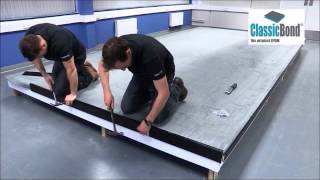
Fit Trim Joining Clip

Snap the joint clips provided in to position.
-
Fit plastic trim Drip or Gutter Trim

Fit plastic trim Drip or Gutter front trim using polypins provided and install jointing clips where necessary.
-
Trim Excess Rubber Membrane

Trim the excess rubber membrane with a sharp knife or scissors. Take care not to score the fascia or gutter.
-
Completed Rubber Roof

The completed rubber roof has a life expectancy of 50+ years and will require very little maintenance throughout its life.
Please feel free to contact us if we can improve our online training resources in any way.