This video and the Step by Step guide below will tell you everything you need to know in order to install a Sure Edge Gutter Drip Trim to a flat rubber roof.
How to install Sure Edge Drip Trim

Step by Step Installation Guide
-
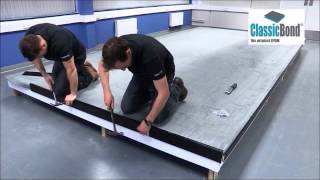
Install the Gutter Trim Back Plate

Install the Sure Edge Gutter Trim Back Plate onto a 50mm by 25mm timber baton along at the gutter edge.
-
Attach with the Nails Provided

Use the stainless steel ring shank nails provided. Allow an expansion gap of 1 mm per metre of run between lengths of Sure Edge PVC trim
-
Fix the Sure Edge PVC Trims into Position

When the membrane installation is complete the Sure Edge PVC trims can be fixed into position. These finish the roof neatly and provide additional securement for the membrane at the roof perimeter
-
Attach the Sure Edge Gutter Trim Front Plate

The Sure Edge gutter trim front plate is nailed into position using the supplied Poly Top nails through the pre drilled fixing holes. This provides the installer with preset centres for the fixings and ensures the gutter Edge is fixed securely and neatly. The pre-applied foam strip forms a water tight seal under compression and enSures water flows over the top of the trim
-
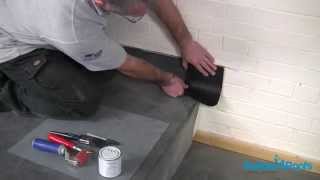
Trim of the excess membrane

Trim off the excess membrane from the Gutter Edge
-
Staple the Membrane

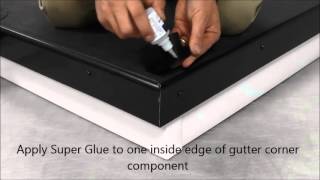
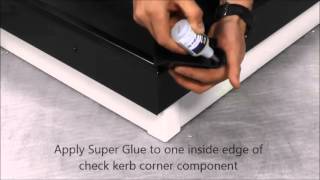
If stapling the membrane at the corners, ensure the staples are always weathered prior to installing the Sure Edge check kerb
-
The End!

Well done - you've installed your Sure Edge Drip Trim!
What you'll need

- Saw
- Hammer
- Knife to trim Rubber Membrane